Getting Started
Simply connect your Asana account and choose a tag to start managing Asana tasks on your WordPress site.
Table of Contents
- Install the Plugin
- Connect Your Asana Account
- Set the Asana Workspace and Site Tag
- Set a Frontend Authentication User
Install the Plugin
Completionist may be installed by extracting the zip file contents into your wp-content/plugins/ directory or by using the built-in WordPress plugin installer:
- Download the Completionist WordPress plugin for free from the Purple Turtle Creative website.
- Log into your WordPress admin area and navigate to Plugins > Add New.
- Click Upload Plugin at the top of the screen.
- Upload the Completionist zip file and click Install Now.
- Activate the plugin once the plugin is installed successfully.
WordPress Multisite (wpmu) Considerations
Completionist is fully compatible with WordPress multisite networks. Feel free to activate the plugin at the network level or per blog/subsite. If you decide to uninstall Completionist, all plugin data will be properly removed across your network.
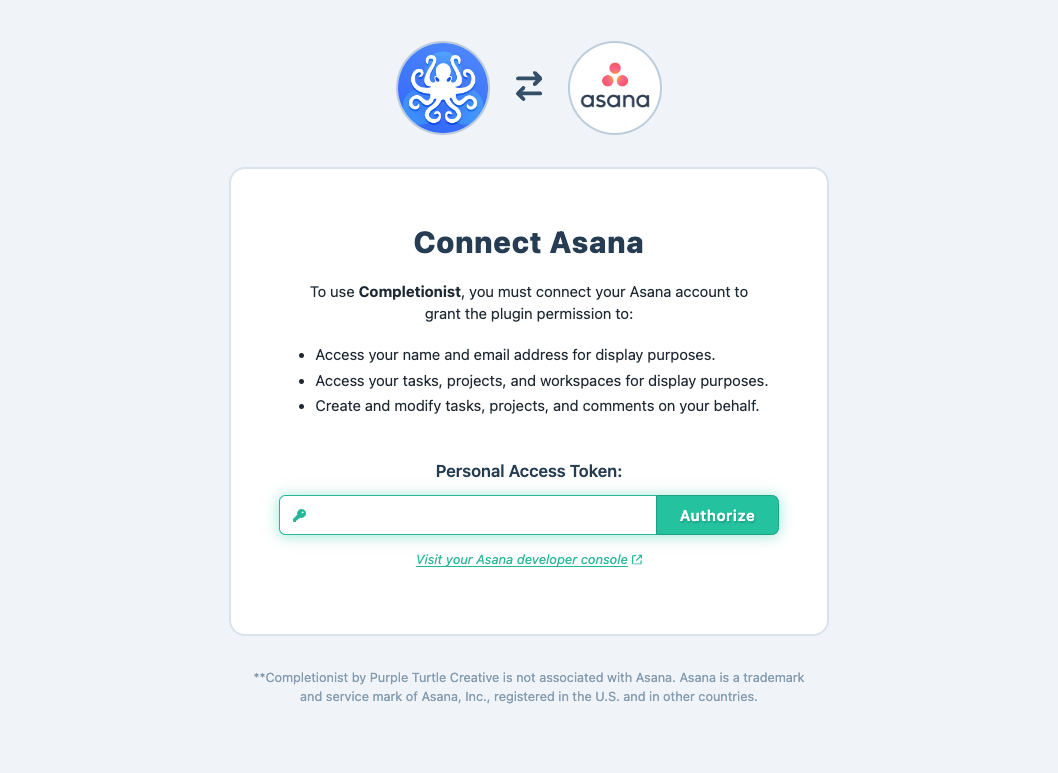
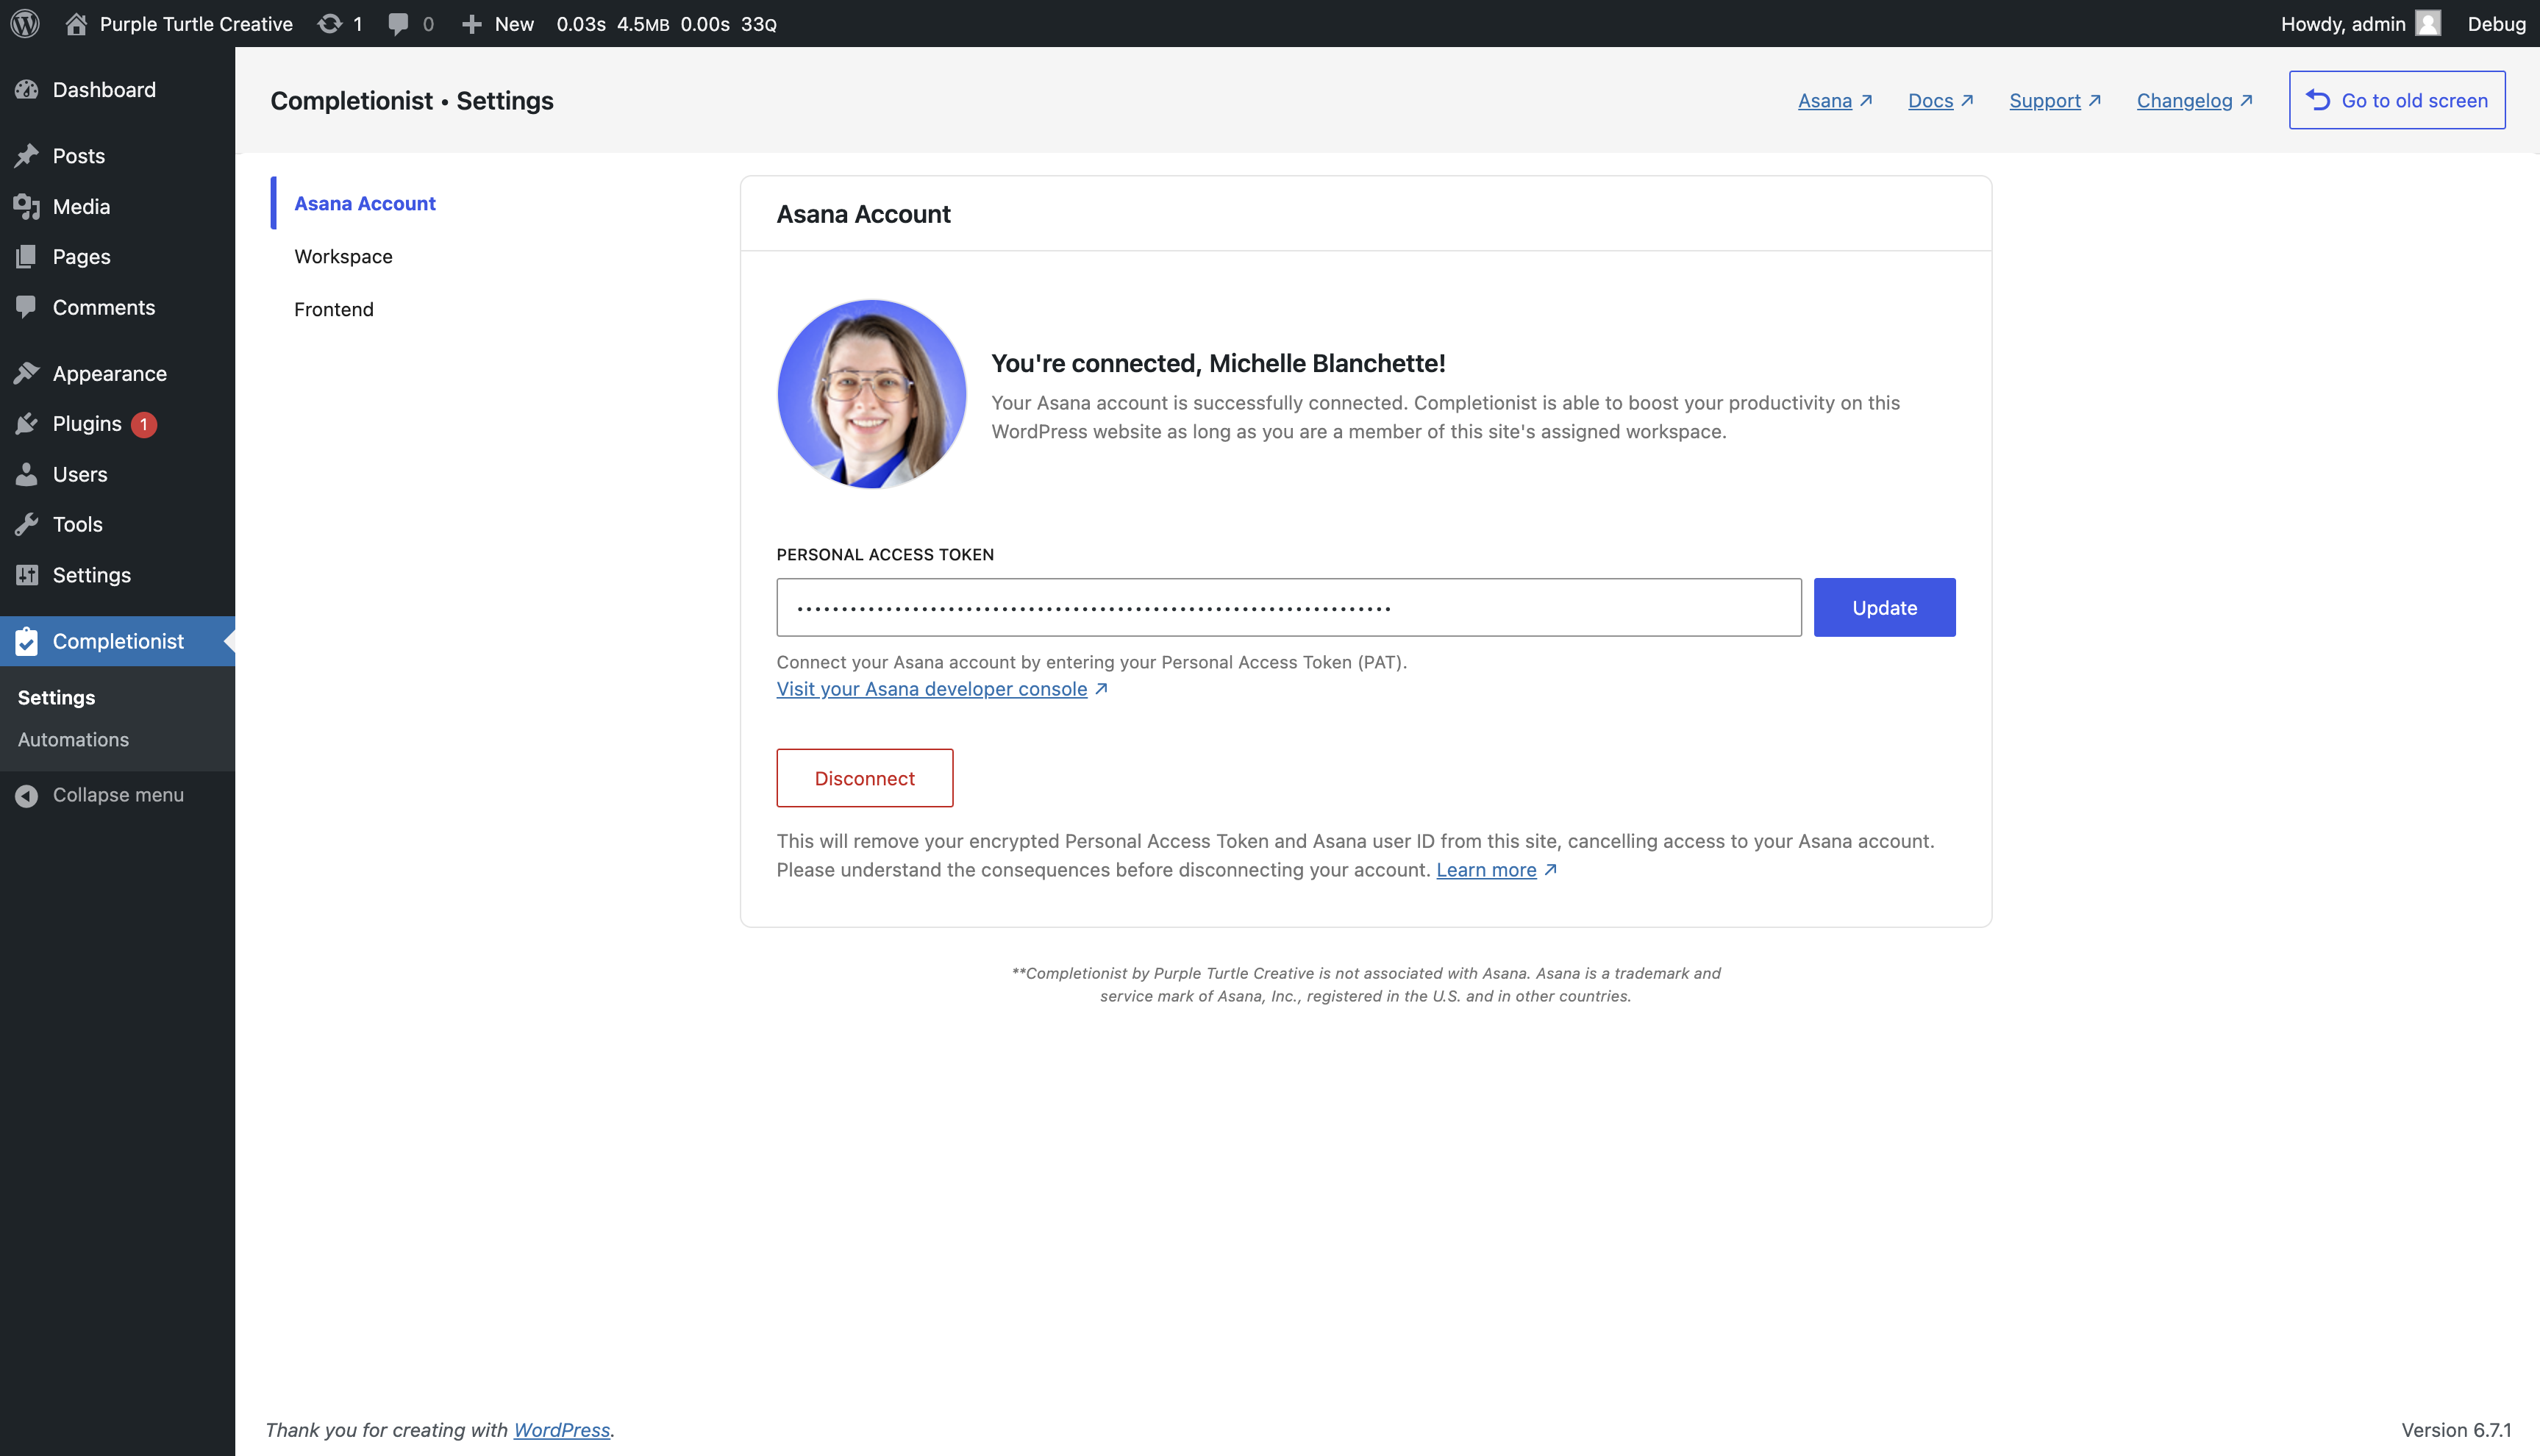
Connect Your Asana Account
- Navigate to the Completionist settings screen by clicking Completionist toward the bottom of your WordPress admin menu.
- In a new browser window, sign into your Asana account and visit your Asana developer console.
- Click to generate a new access token at the bottom of your Asana developer console and follow the prompts.
- Back in Completionist, paste your Personal Access Token into the “Connect Asana” form and click Authorize.
- Once successfully connected, you’ll see your connected Asana profile image and name.
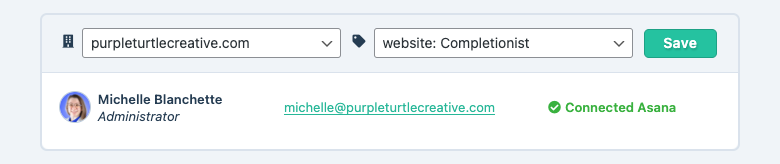
Set the Asana Workspace and Site Tag
A site tag is required to use Completionist’s admin features: the Dashboard Widget, Pinned Tasks metabox, and Automations. Completionist uses the selected Asana workspace and tag to determine which projects, tasks, and users are associated with the WordPress website.
- In the Completionist settings screen, click Workspace in the left-hand menu.
- Choose an Asana workspace.
- Type to search and choose or create a tag within the selected workspace.
- Click Update to save your chosen workspace and site tag.
What does this do?
Pulling Asana tasks into WordPress by a specific tag has many benefits, such as:
- Lets you organize your tasks however you need to within Asana since you aren’t limited to a single project
- Improves performance on WordPress by limiting which tasks are pulled
- Helps you concentrate since you’ll only see relevant tasks listed in your WordPress admin
- Establishes a two-way integration between Asana and Completionist
- Tip: Removing or adding the site tag to tasks within Asana will also remove or add the tasks to your WordPress admin
Set a Frontend Authentication User
If you’d like to display Asana tasks on your WordPress website, you should specify a default “frontend authentication user”. This user’s Asana connection will be used to retrieve the data for display.
- In the Completionist settings screen, click Frontend in the left-hand menu.
- Select a WordPress user. Only users that have connected their Asana account to Completionist will be listed.
- Click Save to confirm your chosen user.
- In a post or page on your WordPress website (can be any status, such as Draft), enter a Completionist shortcode in the content area. Save the post.
- Preview the post or page to confirm that the shortcode works as expected.
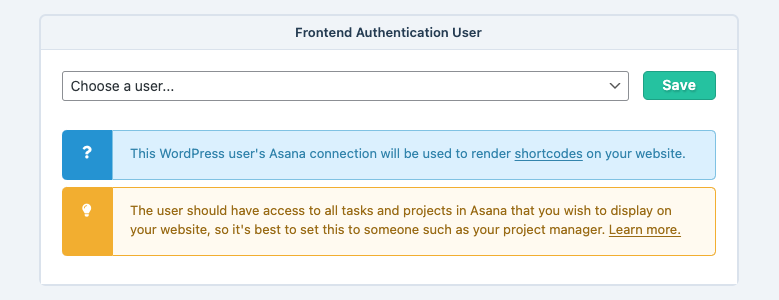
Who should I choose?
The authentication user determines which tasks will be displayed and is based on their visibility permissions within Asana.
If you’d like to be fully transparent on your website, then you should choose someone with access to all tasks within Asana. This is most often an Asana workspace owner or the project manager.
If you’d like to limit which tasks are viewable on your website, then you should choose someone with the same limited visibility within Asana.